Covid-19 Support Page
Do You Have Spare Medical Supplies
Let our team work to put those items into the hands of those who need them today!
RESTAURANT WORKERS RELIEF PROGRAM
DETAILS OF THE PROGRAM
Dinners are offered on a first-come, first-serve basis. Limit 1 package per person unless there is an emergency situation. We will also have essential supplies on hand. We will limit how much any one person can take of these supplies, but they will be handed out free to those in need. We will continue to offer this program until we can no longer financially support the program.
PICKUP INFORMATION
-This program will be offered 7 days a week until otherwise notified.
– Pickup time is between 10am and noon or 5pm and 7pm based on location and day of the week. More details to follow.
Take Out Louisville
CUSTOMERS:
Visit the site today to see which local restaurants are still open so that you can support them with your patronage. The Louisville Community has responded and are willing to do what it takes to help these business survive this crisis.
BUSINESS OWNERS
You can easily create a Take Out Louisville account on the website and register your business listing so that customers can see your full offering during the COVID-19 Crisis.
Testing for COVID-19
How to decide if you should be tested or seek care:
Not everyone needs to be tested for COVID-19. Here is some information that might help you make decisions about seeking medical care or testing.
- Most people have mild illness and are able to recover at home without medical care. They may not need to be tested.
- There is no treatment specifically approved for people who have COVID-19.
- If you think you may be sick, stay home and consult with your healthcare provider on the need for testing.
CDC has guidance for who should be tested, but decisions about testing are at the discretion of state and local health departments and/or individual clinicians.
- Clinicians should work with their state and local health departments to coordinate testing through public health laboratories, or work with clinical or commercial laboratories.
How to get tested
CDC has provided guidance for who should be tested, but decisions about testing are at the discretion of state and local health departments and/or individual clinicians. COVID-19 testing differs by location. If you have symptoms of COVID-19 and want to get tested, call your medical provider first. You can also visit your state or localexternal icon health department’s website to look for the latest local information on testing. While supplies of these tests are increasing, it may still be difficult to find a place to get tested.
What to do after you are tested
- If you test positive for COVID-19, know what protective steps to take If You Are Sick or Caring for Someone.
- If you test negative for COVID-19, you probably were not infected at the time your specimen was collected. However, that does not mean you will not get sick. It is possible that you were very early in your infection when your specimen was collected and that you could test positive later. Or you could be exposed later and then develop illness. In other words, a negative test result does not rule out getting sick later.
Community transmission of COVID-19 is occurring in parts of the United States. In the coming months, most of the U.S. population will be exposed to this virus. You should continue to practice all the protective measures recommended to keep yourself and others from getting infected. See How to Protect Yourself.
Additional information: U.S. Food and Drug Adminstration FAQs on Diagnostic Testing for SARS-CoV-2external icon.
How to Make a Cloth Mask from Home:
Sew & No Sew Instructions
Sewn Cloth Face Cover:
Materials:
- Two 10”x6” rectangles of cotton fabric
- Two 6” pieces of elastic (or rubber bands, string, cloth strips, or hair ties)
- Needle and thread (or bobby pin)
- Scissors
- Sewing machine
Tutorial
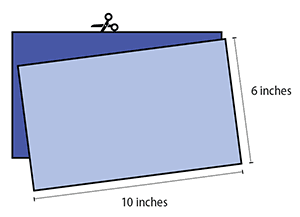
1. Cut out two 10-by-6-inch rectangles of cotton fabric. Use tightly woven cotton, such as quilting fabric or cotton sheets. T-shirt fabric will work in a pinch. Stack the two rectangles; you will sew the mask as if it was a single piece of fabric.
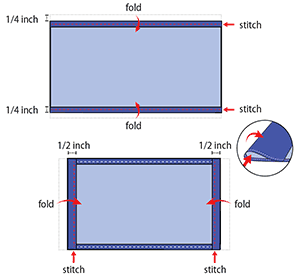
2. Fold over the long sides ¼ inch and hem. Then fold the double layer of fabric over ½ inch along the short sides and stitch down.
3. Run a 6-inch length of 1/8-inch wide elastic through the wider hem on each side of the mask. These will be the ear loops. Use a large needle or a bobby pin to thread it through. Tie the ends tight.
Don’t have elastic? Use hair ties or elastic head bands. If you only have string, you can make the ties longer and tie the mask behind your head.
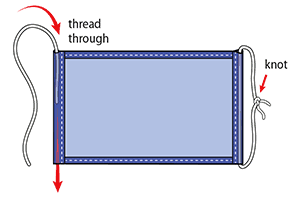
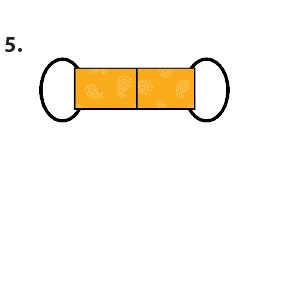
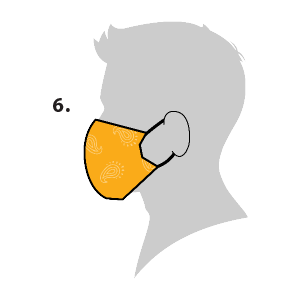
4. Gently pull on the elastic so that the knots are tucked inside the hem. Gather the sides of the mask on the elastic and adjust so the mask fits your face. Then securely stitch the elastic in place to keep it from slipping.
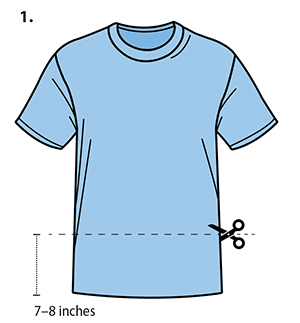
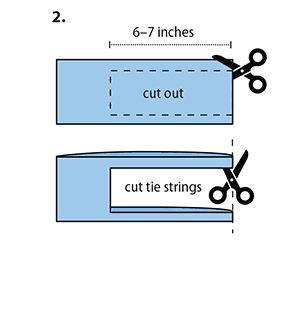
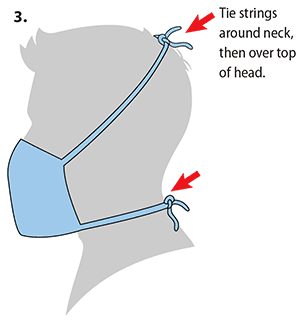
Quick Cut T-Shirt Cover (no sew method)
Tutorial
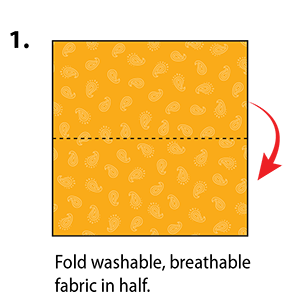
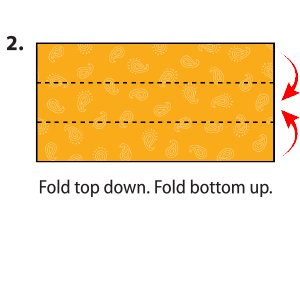
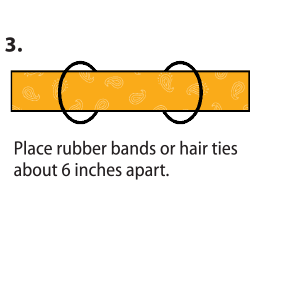
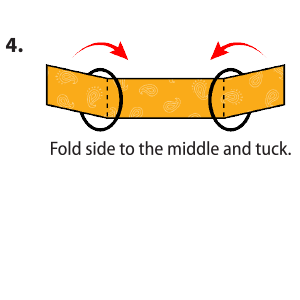
Bandana Face Covering (no sew method)
Materials
- Bandana (or square cotton cloth approximately 20”x20”)
- Rubber bands (or hair ties)
- Scissors (if you are cutting your own cloth)
Tutorial
